Setting up IIS as Reverse Proxy for the .Net Core Kestrel Web Server
We often need to set IIS as Reverse Proxy server especially when you host some self-hosted web application in your server. You may not want them directly appear your web application instead you want to route through your existing IIS web server. And this technique is even useful when you want to setup a Load balancing or failover for your web application. Generally IIS can be setup as a reverse proxy using ARR (Application Request Routing) and URL Rewrite modules.
This is just not about running your .Net Core Kestrel behind the IIS but you can use this technique for all other web applications or services.
Step 1:
Download ARR (Application Request Routing) from below URL.
Step 2:
Stop WAS and WMSVC processes by typing. This step is necessary because ARR installs a Hotfix.
Open your elevated command prompt using Run As Administrator and type below commands.
net stop was /y
net stop wmsvc /y
You may not be having WMSVC (Web Management Service) if just ignore the error saying “Service name invalid”
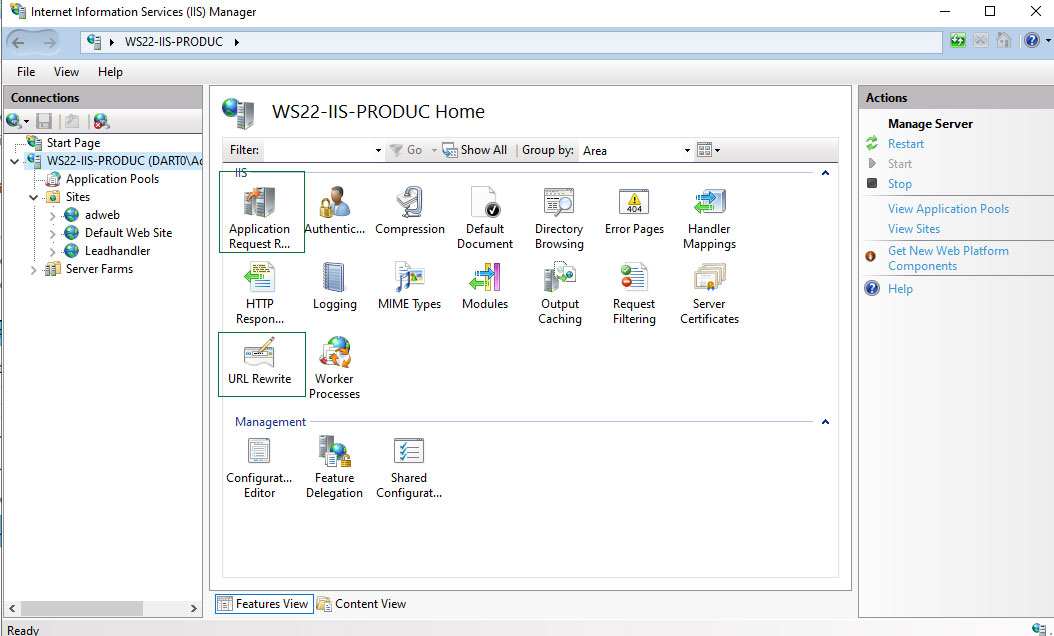
Step 3:
Step 4:
net start was
TEST Blog
net start wmsvc
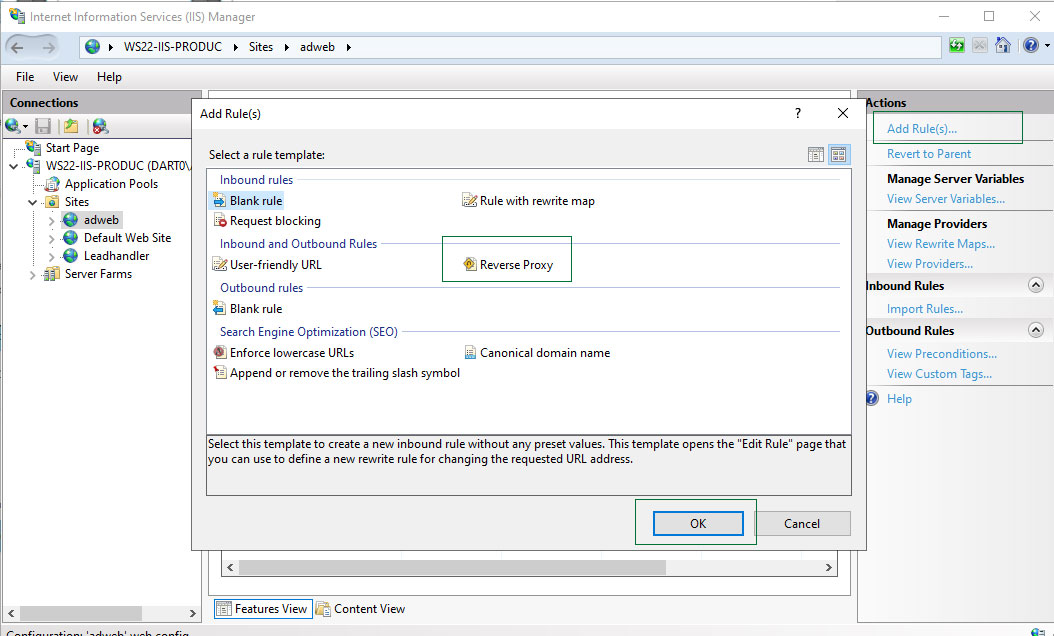
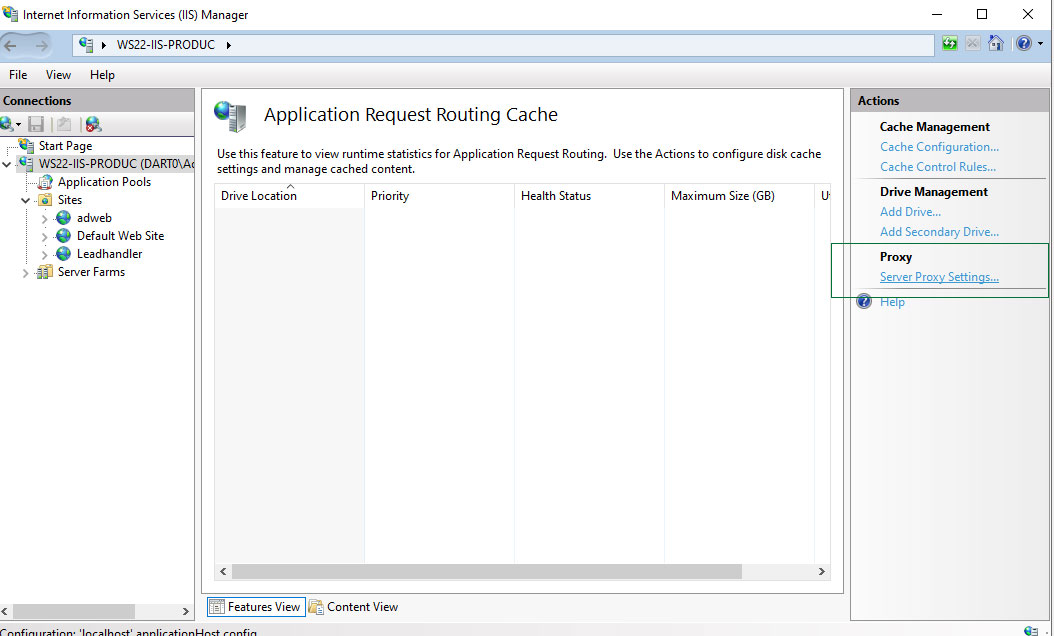
Step 5:
Step 6:
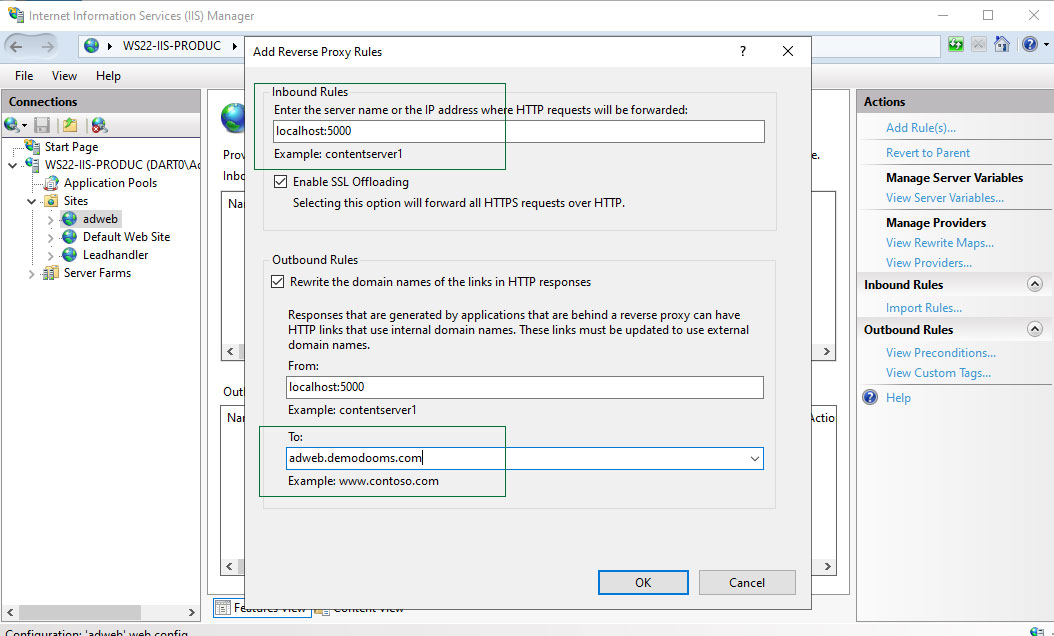
Step 7:
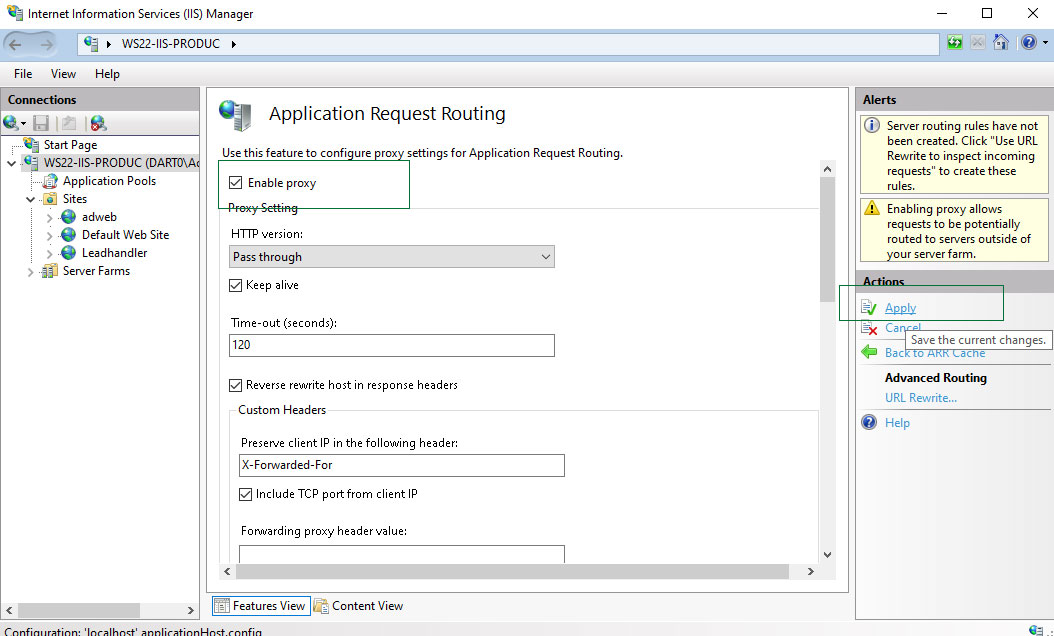
Check on Enable Proxy and then Click Apply.
Step 8: