Setting up XOAUTH2 authentication for sending emails from web applications using Office 365 Email accounts

Office 365 offers Oauth2 method for sending emails in their own way which obviously a process that needs some steps to configure at first time. Once configured then this will be easier and you will have more control over your email deliveries than the regular SMTP method. To send Oauth2 emails using Office 365 you need 4 parameters as below.
- Object ID (User account’s object id)
- Client Id
- Tenant Id
- Secret
Create a Tenant:
- If you have created a tenant already then skip below steps and just copy the tenant id.
- Login to Azure portal (https://portal.azure.com/)
- Click on Microsoft Entra ID menu from the Hamburg menu on left side.
- Click on Manage Tenants then click + Create
- Leave default at 1st screen and fill up your organizational details at the 2nd screen.
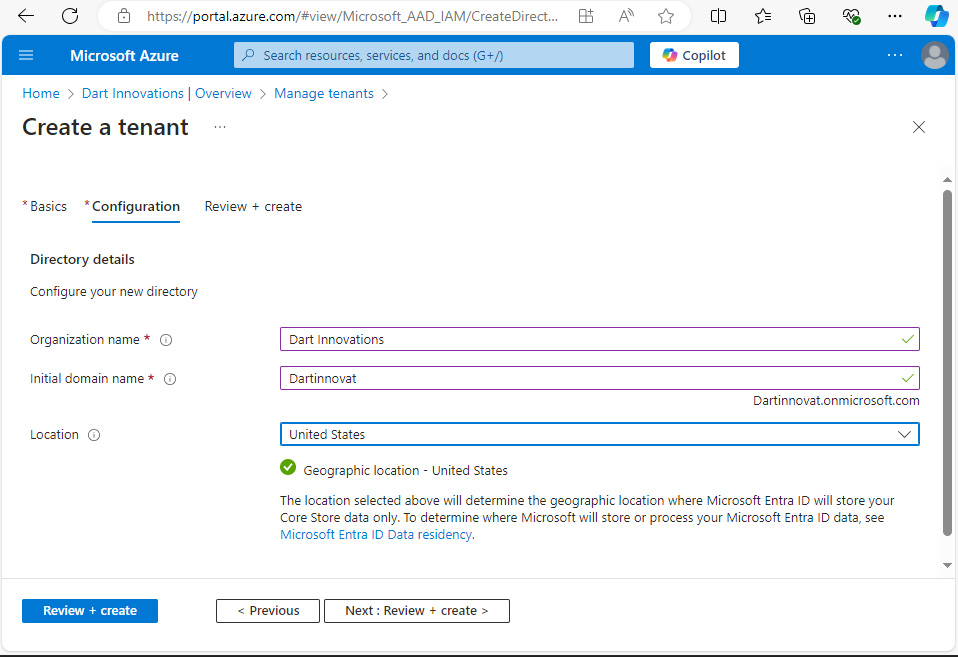
- Click Review + Create. Again click Create in next screen to complete the tenant creation.
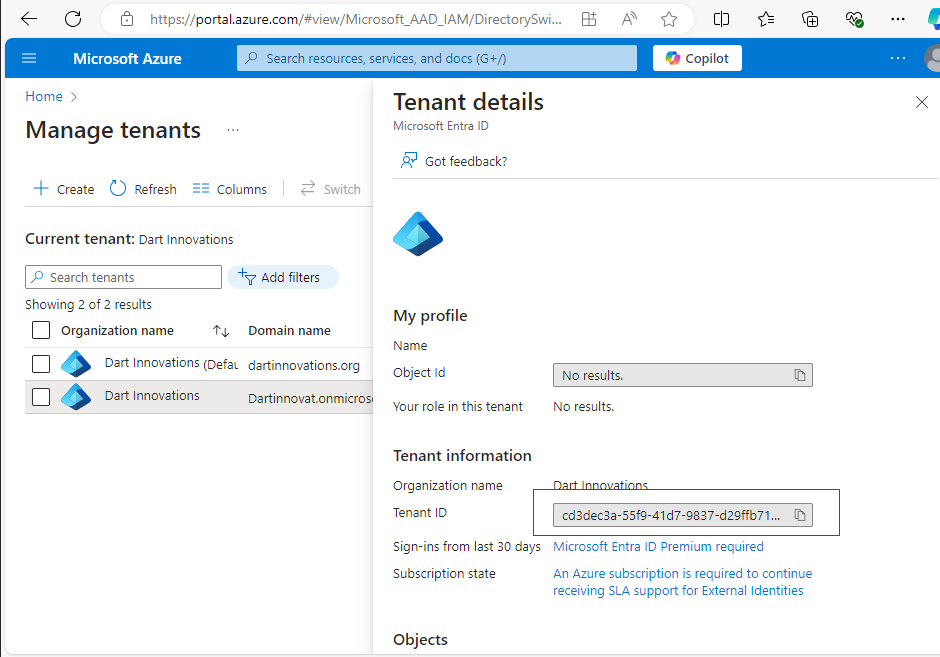
- It may take few seconds for new tenant to appear in the dashboard.
- Once the new tenant appears, click on the Tenant and copy the Tenant ID from the right side pop-up.
Register an application:
- Sign in to the Microsoft Entra admin center (https://entra.microsoft.com).
- If you have multiple tenants then use the settings icon
 at top to switch between tenants and make sure to select the right tenant.
 - From the left menu, browse to Identity > Applications > App registrations and select New registration.
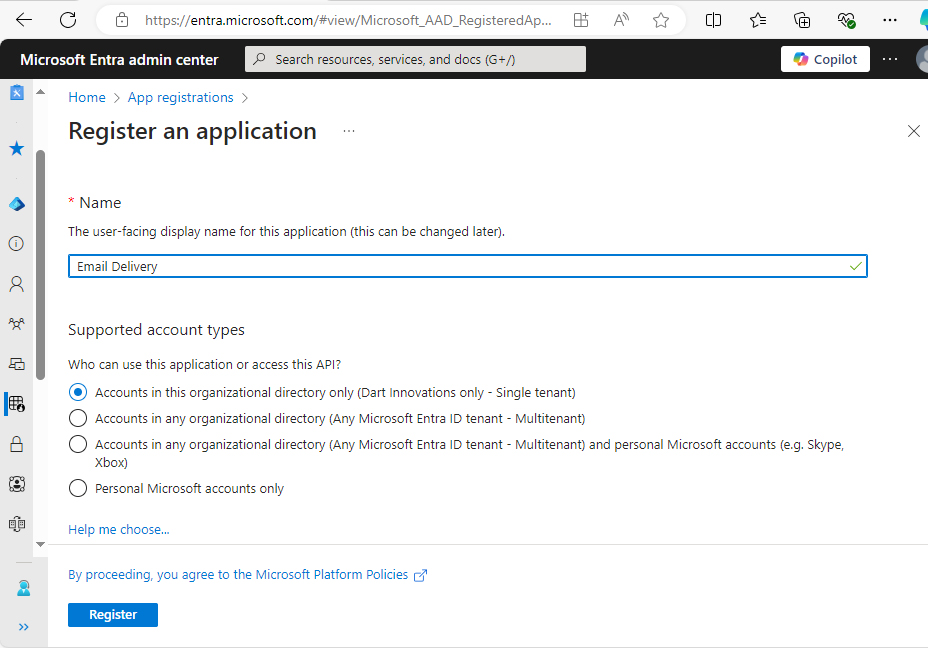
- Name your app and leave the rest as default. Click Register.
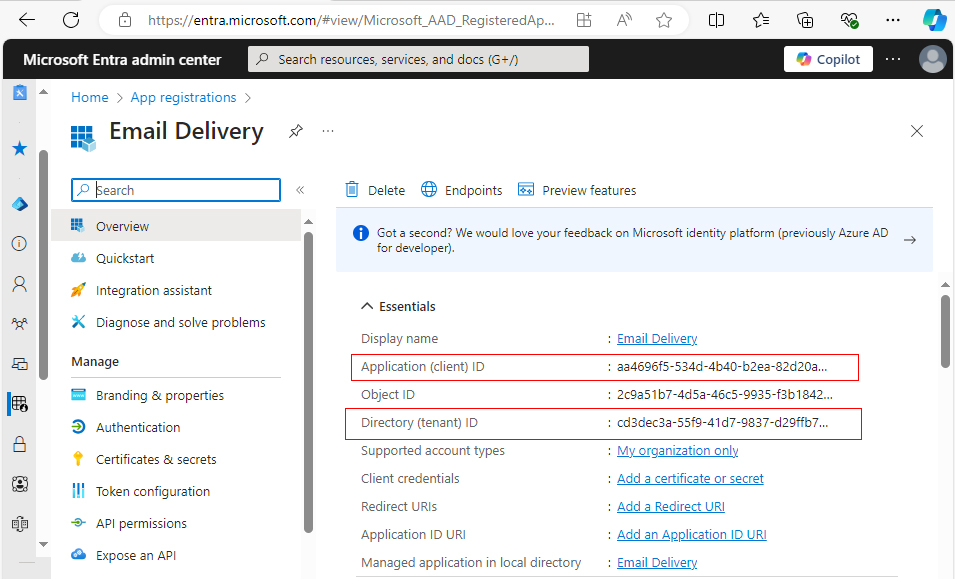
- In the next screen you will see the Application (client) ID copy that. You can also see tenant id, copy that if you haven’t copied during tenant creation.
- Click Certificates & secrets. Click +New Client Secret.
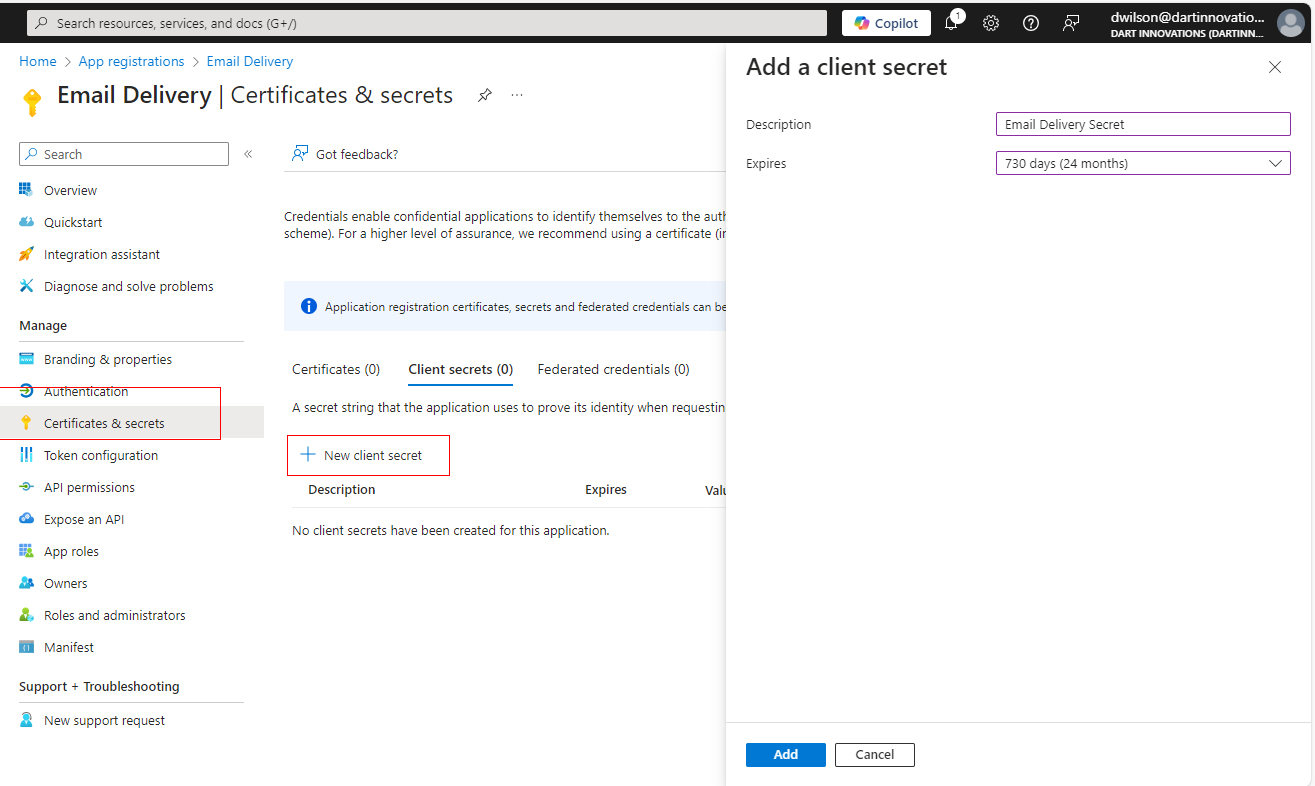
- Fill up a description for your reference and set expiry. You can set expiry up to 2 years. Let’s set the maximum and click Add.
- In the next screen you can see the client secret value, copy that.
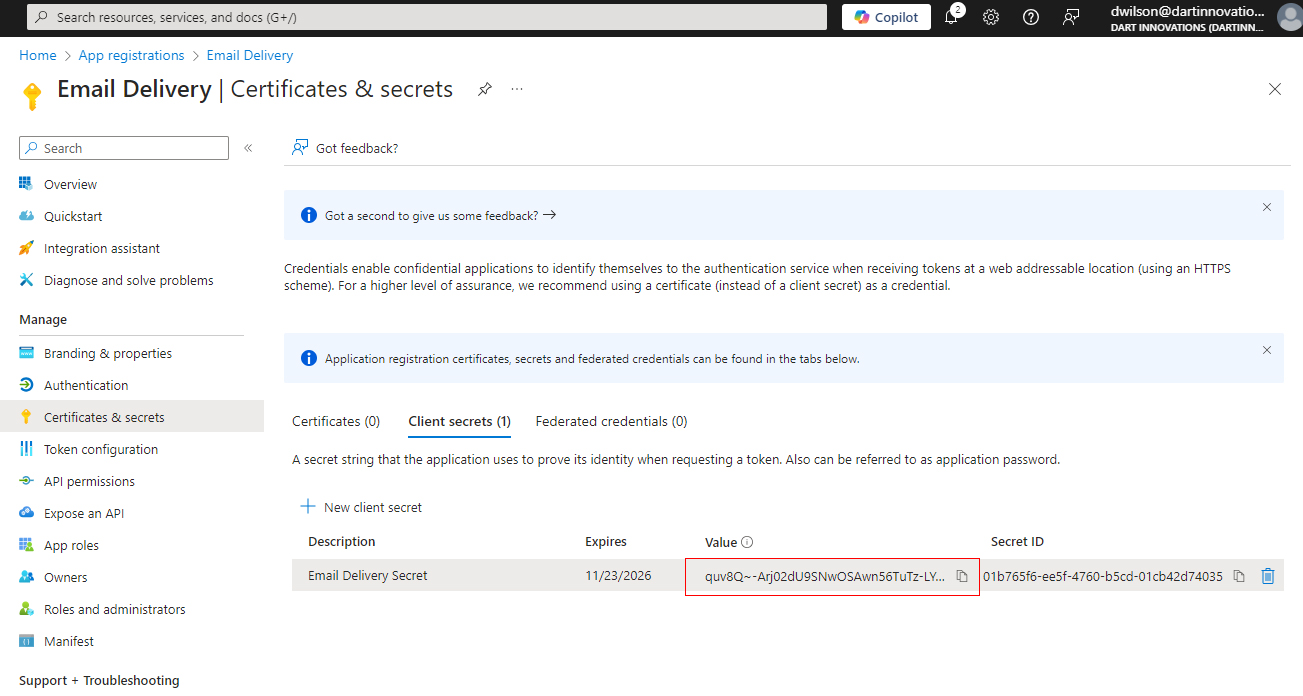
You can’t access this client secret value once you left this screen. Hence it is imperative that you copy and save somewhere.
- Next step is to Click on API Permissions (in the left menu) and then click on “Add a Permission” button. You will get the following screen.
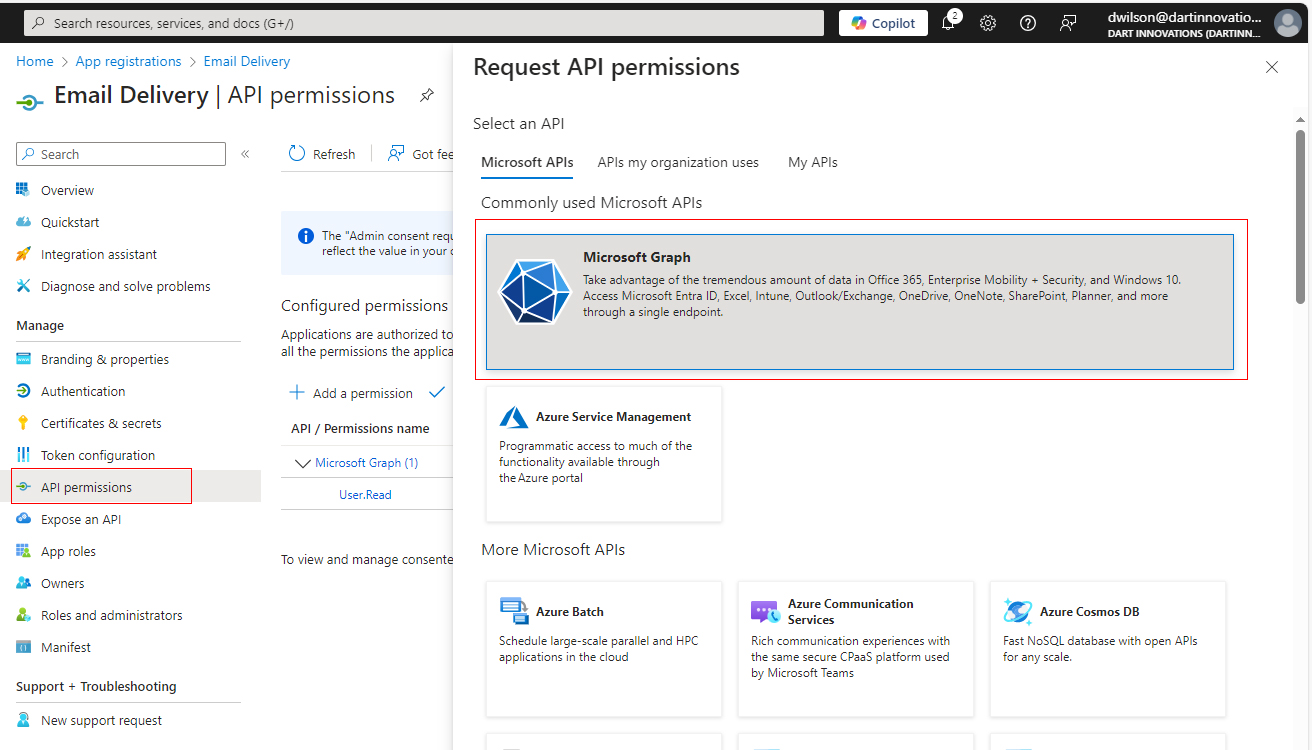
- Click on Microsoft Graph (as highlighted above) and then Application Permissions and then search for Mail and select Mail.Send (see below)
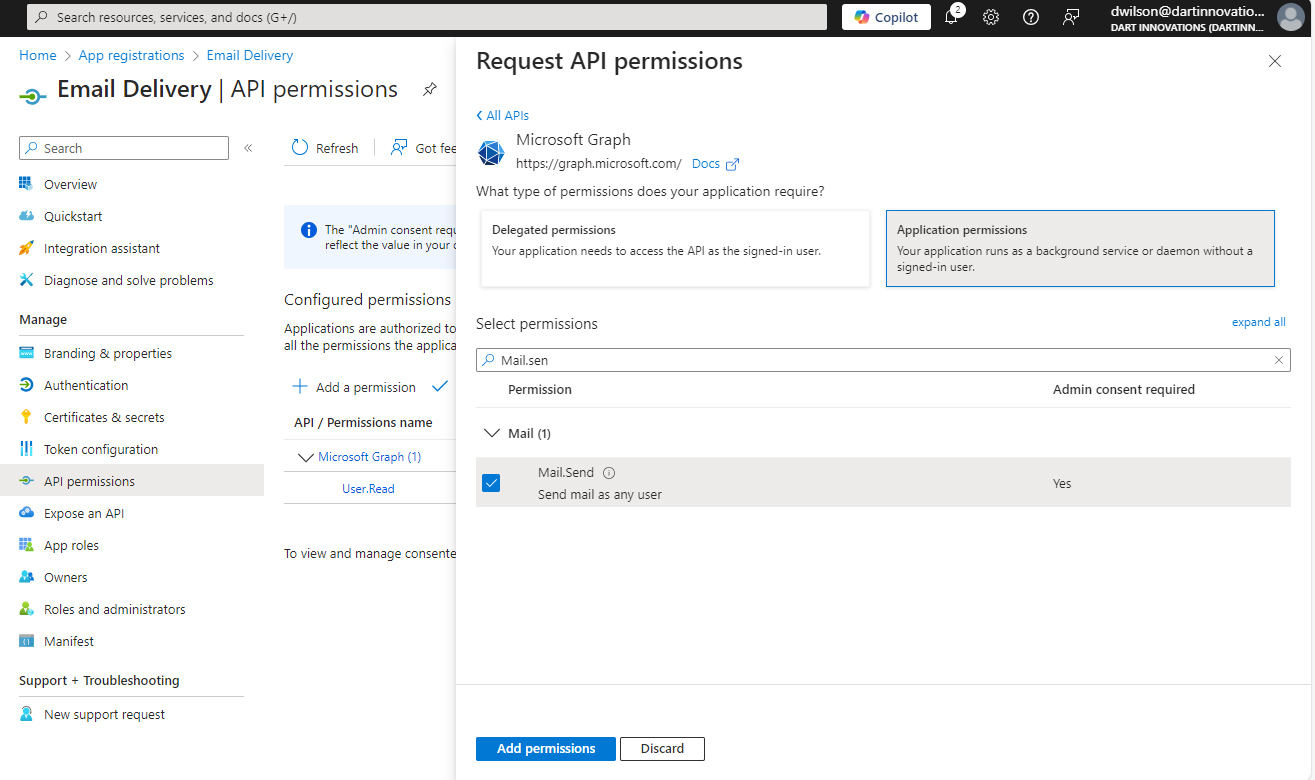
- Click Add Permissions.
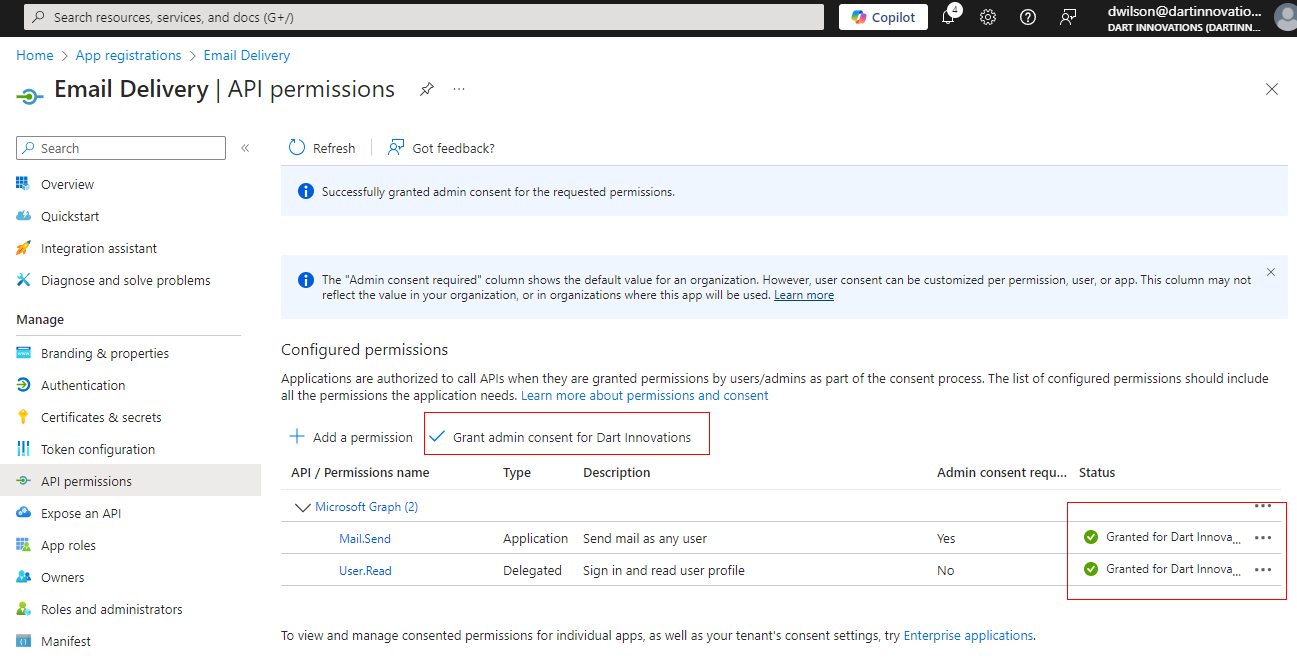
- Once the permissions are added to the API, click on “Grant admin consent” button to grant admin consent so that your code can have access to the required permissions and you can successfully send the Email. Make sure you have “Green tick” on the API as highlighted below.
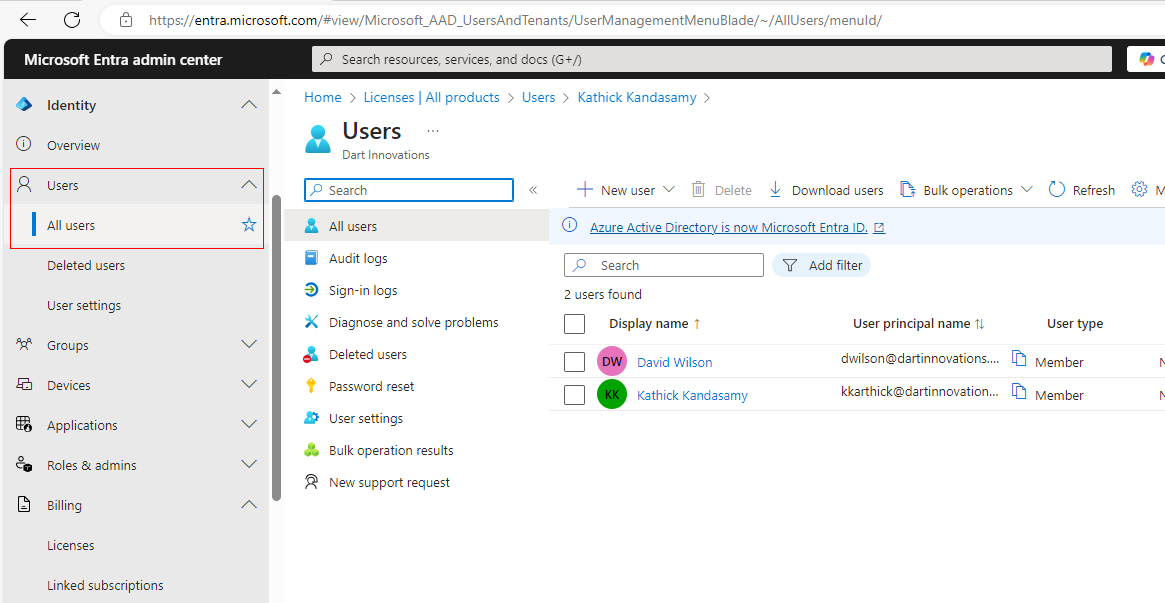
- From the left menu click on Users >> All Users.
- Click on the user account from which you are going to send emails.
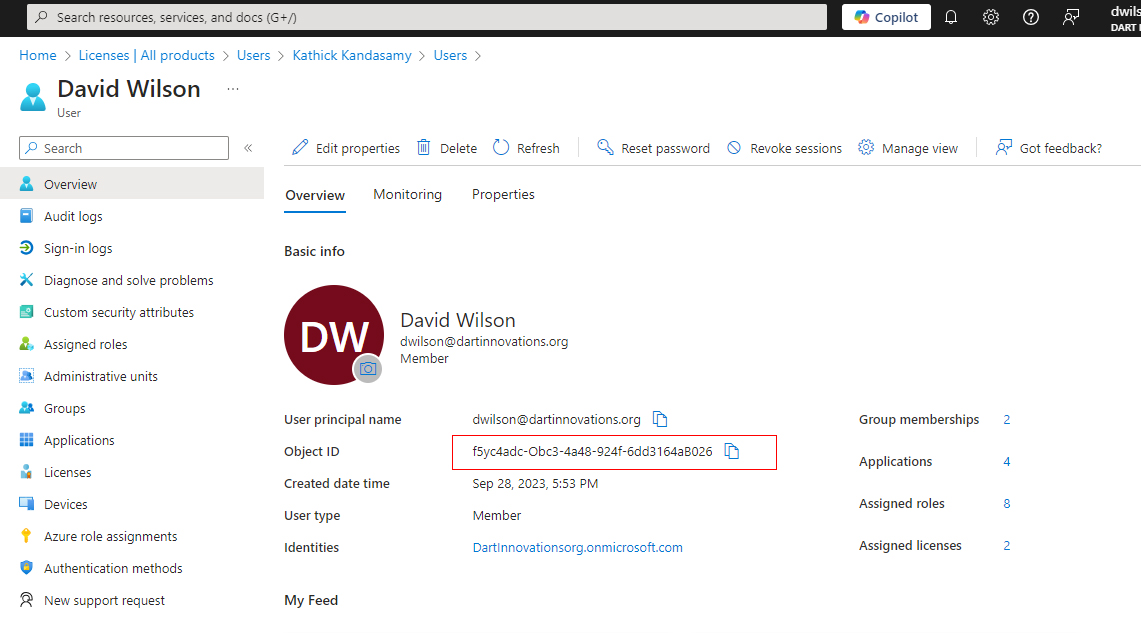
- Copy the object id of user account.
Click on Applications Tab and verify the OAuth application you created for Email delivery appears. If it is not appearing then go to Applications >> Enterprise Applications menu from the entra’s main menu (Hamburg) where you can assign this user to that application.
That’s it!! You now have the required configuration and parameters to send O365 OAuth emails from your application.
