Installing Magento 2.4.x with Elasticsearch in Ubuntu

From Magento 2.4.0 all installations must be configured to use Elasticsearch a powerful search module used with Magento’s catalog search solution. If you are upgrading you must install and configure Elasticsearch before you upgrade Magento. It’s not difficult to setup Elasticsearch, but there are a lot of steps. Although you may feel as an unnecessary task but the benefits are huge as an ecommerce site finally the search is the most powerful options for users than the regular menus or categories. Thus it is imperative to enhance the speed and accuracy of your search component.
Let us go to the step by step process of installing Elasticsearch and then Magento 2.4.x
Install and Configure Elasticsearch
At first, update the packages index and install the apt-transport-https package that is necessary to access a repository over HTTPS.
 sudo apt update
 sudo apt install apt-transport-https
We need OpenJDK to be installed before installing Elasticsearch, so let’s do that.
sudo apt install openjdk-11-jdk
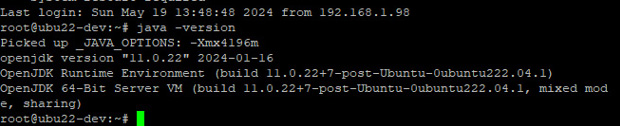
Run the below command to verify the Java version which should output like the below image. If so, the Java installation is good.
java -version
Add Elasticsearch repository using Wget command. The command will add the public GPG key to Apt and the repository imported will be added to trust list.
wget -qO - https://artifacts.elastic.co/GPG-KEY-elasticsearch | sudo apt-key add -
Next, add the Elasticsearch repository to the system by issuing below command.
sudo sh -c 'echo "deb https://artifacts.elastic.co/packages/7.x/apt stable main" > /etc/apt/sources.list.d/elastic-7.x.list'
Update the apt package list.
sudo apt update
Finally install Elasticsearch
sudo apt install elasticsearch
We need to enable and start the Elasticsearch after installation.
 sudo systemctl enable elasticsearch.service
 sudo systemctl start elasticsearch.service
You can verify the Elasticsearch by sending an HTTP request to port 9200 on localhost using curl command
curl -X GET "localhost:9200/"
This should output like the image below. If so, your Elasticsearch installation is good to go.

Install Magento 2.4.x
Assuming you have downloaded either via composer or manual and kept in your web directory.
- Create a new database and keep your database details (DB name, username and password)
- Login to SSH and change your directory to your web directory (Ex: cd /var/www/magento 2.4)
- Make sure the user you login has the read/write access to the entire web directory.
- Now, let’s issue the command below. Make sure you are changing all necessary values to yours before running the command.

If your parameters are correct your installation will process and output the result like below image.
php bin/magento setup:install --base-url=https://yourdomain.com/ --db-host=localhost --db-name=dbname --db-user=dbuser --db-password=password --admin-firstname=Admin --admin-lastname=Admin [email protected] --admin-user=admin --admin-password=Password --language=en_US --currency=USD --timezone=America/Chicago --use-rewrites=1 --search-engine=elasticsearch7 --elasticsearch-host=localhost --elasticsearch-port=9200 --backend-frontname=admin
Now check both your front site and admin site on the browser.
Another issue that you will face, after installation is done, you will not be able to login Magento admin panel because in Magento 2.4 two-factor authentication is installed and it will not let you login until you provide the correct email and configure SMTP so that Magento can send an email, in that case, the only solution we found is to disable the two-factor authentication module using below command.
php bin/magento module:disable Magento_TwoFactorAuth
For Magento 2.4.6 or greater use below command
php bin/magento module:disable {Magento_AdminAdobeImsTwoFactorAuth,Magento_TwoFactorAuth}